hexo 搭建 blog 笔记
hexo 搭建 blog
hexo 前置环境
Git
Git 需要绑定好 Github 的账号与邮箱,并能够建立连接
Node.js
尽量请使用 Node.js LTS 版本
hexo 安装
1 | npm install -g hexo-cli # npm 安装 hexo |
hexo 初始化
1 | hexo init blog # 初始化 hexo |
blog 是 hexo 初始化的文件夹,是博客根目录,可以更换成自己喜欢的文件夹名
1 | cd blog # 切换到博客根目录 |
以下用 ~/ 指代博客根目录。
hexo 生成静态网页文件
1 | hexo generate # 自动化生成静态网页文件 |
可选的额外选项:
1 | hexo g # 简化指令 |
hexo 服务
1 | hexo server # 开启服务 |
开启hexo服务后,即可通过本地访问 blog 页面(默认为
localhost:4000 )预览博客页面。
可选的额外选项:
1 | hexo s # 简化指令 |
hexo 部署
这里通过 Github 的免费托管仓库进行部署博客。
先用 Github 创建一个名为 <username>.github.io
的仓库
以我为例创建的仓库名为
HasegawaAzusa.github.io
在博客根目录下安装 hexo-deployer-git 部署插件
1 | npm install hexo-deployer-git --save |
更改 hexo 站点配置文件 (~/_config.yml) 中的 Deployment配置项
以我为例更改的配置项结果为
1 | deploy: |
repo使用 ssh 链接的原因:我的 git 使用 ssh 与 github 进行远程连接git 使用 https 与 github 进行远程连接请使用 https 链接
在博客根目录下,输入部署指令
1 | hexo deploy # 部署指令 |
可选的额外指令
1 | hexo d # 简化指令 |
等待一段时间后,可以通过
https://<username>.github.io 访问自己的博客。
以我为例链接为 https://hasegawaazusa.github.io
hexo 入门
hexo 更新
1 | npm update -g hexo-cli # 使用 npm 更新 hexo |
hexo 新建博文
1 | hexo new hello # 新建博文 |
hello可自由更改,对应生成的md文件名
可选的额外选项:
1 | hexo n hello # 简化指令 |
然后进入 ~/source/_posts/ 找到 hello.md
,打开文件,内容如下
1 | title: hello |
该头为 Front-matter ,参数如下:
title→ 博文标题date→ 发布日期,默认为文件创建日期tags→ 博文标签
修改后,在正文处输入内容即可编辑博文内容。.md格式文本示例如下:
1 | --- |
hexo 主题
进入 https://hexo.io/themes/ 进行挑选合适的主题
这里以配置 NexT 主题为例:
打开 Powershell 输入以下命令,安装 NexT
主题
1 | npm install hexo-theme-next --save |
更改 hexo 站点配置文件 (~/_config.yml) 中的 Extensions配置项
1 | theme: next |
重新进行网页生成即可
1 | hexo clean # 清除缓存 |
了解 NexT 主题的更多信息可以使用NexT 笔记
hexo 博文插入超链接
对于站外的超链接,直接将外站的完整链接贴入括号内即可
([value](link)),例如
1 | 点击[这里](https://hasegawaazusa.github.io)进入博客 |
效果如下
点击这里进入博客
对于站内的超链接,最好使用另一篇博客的 permalink 贴入
(有关 permalink 可参考hexo 配置详解),例如
1 | 点击[这里](/hexo-note.html)进入博客 |
效果如下
点击这里进入博客
若需要导航,可以使用 permalink#title ,例如
1 | 点击[这里](/hexo-note.html#hexo 博文插入超链接)进入博客 |
效果如下
点击这里进入博客
hexo 博文插入图片
更改hexo配置文件 (next/_config.yml) 中的Writing配置项
1 | post_asset_folder: true |
该选项为真时,新建博文会对应生成一个与文章同名的文件夹,可以将相关图片资源放进此文件夹内
在博客根目录下安装hexo-asset-image插件
1 | npm install hexo-asset-image --save |
将相关图片资源放进对应文件夹并直接使用文件夹内的资源即可。
特别地,对于 Typora 使用者,可以在
文件 - 偏好设置 - 图像 中修改设置:
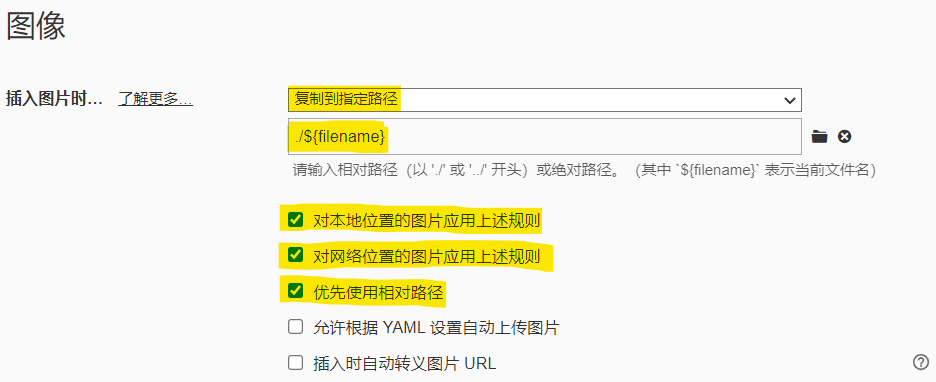
这样,当 Typora 插入图片时,会自动将图片资源复制进入
hexo 可以检索的 asset 文件夹
hexo 添加标签页
在博客根目录下:
1 | hexo new page tags |
在 Front-matter 中添加:
1 | type: tags |
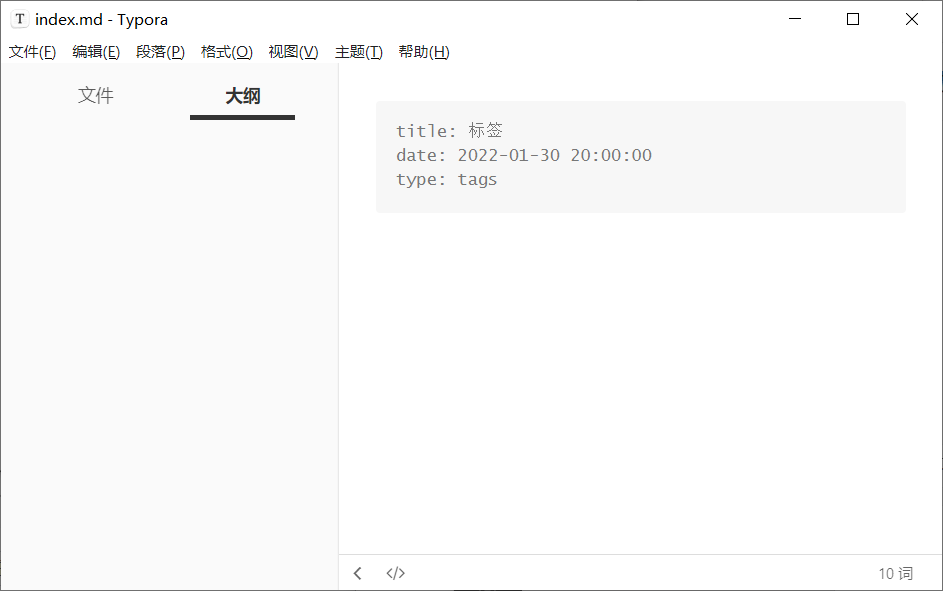
完成后 hexo 便会自动生成标签页
记得在菜单中添加进入方式
hexo 添加关于页
在博客根目录下:
1 | hexo new page about |
在 Front-matter 中添加:
1 | type: about |
在正文中输入关于页内容即可
记得在添加进入方式
hexo 添加 404 页面
在博客根目录下:
1 | hexo new page 404 |
在 Front-matter 中添加:
1 | permalink: /404 |
在正文中输入你需要的内容即可
如果需要其他自定义页面,可以使用 layout 参数
hexo 配置详解
hexo 博文头 - Front-matter
| 参数 | 意义 | 默认值 |
|---|---|---|
layout |
排版 | config.default_layout |
title |
标题 | 文件名 |
date |
发布日期 | 文件创建日期 |
updated |
更新日期 | 文件更新日期 |
comments |
简介 | true |
tags |
标签 | |
categories |
分类 | |
permalink |
永久链接的相对路径
(如/index.html) |
null |
excerpt |
纯文本摘录 (需要使用插件Post-Excerpt) | |
disableNunjucks |
是否禁用 Nunjucks 的宏
({{ }} / {% %})
和 tag plugins 插件 |
false |
lang |
指定语言 | _config.yml |
hexo 站点配置文件
即 ~/_config.yml 参数详解
网站 - Site
title→ 博客标题
1 | # Site |
网址 - URL
1 | # URL |
一般只需要修改
url
目录 - Directory
1 | # Directory |
一般无需修改
文章 - Writing
1 | # Writing |
首页设置 - Home page setting
1 | # Home page setting |
分类 & 标签 - Category & Tag
1 | # Category & Tag |
日期 / 时间格式 - Date / Time format
1 | # Date / Time format |
分页 - Pagination
1 | # Pagination |
扩展 - Extensions
1 | # Extensions |
部署 - Deployment
1 | # Deployment |